
Last year was the first time my family hosted a gingerbread competition, and I was super excited to be as creative as I could be. Jeremy and I brainstormed about several different ideas of what to make. We came across this website called Gingerbread House Patterns. (which I think the website is inactive now, because I tried to link it to this post, and I was unable to find them) However, they had several templates that could be purchased and downloaded. Jeremy really wanted to try to do a Big Ben Gingerbread house, but when I saw the template, it looked quite difficult. We wound up downloading a template to make a shoe house. Like the Old Lady Who Lived in a Shoe. And let me apologize in advance, the house I made this year is very nice, but its no where nearly as creative as the one I made last year.

While making the gingerbread house we learned so many things that I didn’t know before that I wanted to share.
Gingerbread Cookie Dough
Ingredients
3 cups flour
1/2 tsp baking soda
2 tsp ground ginger
1 tsp ground cinnamon
1/4 tsp ground allspice
1/8 tsp ground cloves
1/4 tsp salt
1 stick softened butter
1 cup light brown sugar
1 large egg and 1 egg yolk
1/2 cup dark molasses
Wilton’s Meringue Powder
Confectioners Sugar – about 4 cups
Directions
- In a stand mixer cream brown sugar and butter. until smooth.
- Beat in the egg, egg yolk, and molasses until combined.
- On low speed, slowly mix the dry ingredients(flour, salt, ginger, allspice, cloves, cinnamon, baking soda) into the wet ingredients. The dough will be pretty thick.
- Divide cookie dough in half, flatten into discs and wrap each disk tightly in plastic wrap. Chill in the refrigerator for 2 hours or up to 3 days.
- Preheat oven to 350 degrees. Line a baking sheet with parchment paper.
- Remove each disc from the refrigerator and roll out to about 1/8 inch thick on a floured surface.
- If you are using a template for your gingerbread house cut out the shapes. Lightly flour the underside of the gingerbread house template shape. Use a pizza cutter to carefully cut the dough into the gingerbread house template shapes. Your template will tell you how many of each shape you will need. If you are using gingerbread house cookie cutters simply press each cookie cutter into the dough. Re-roll dough scraps to ensure you have enough dough for the whole house. Feel free to use any extra dough to make other fun shapes to embellish your house. I made a few snowflakes, trees, and extra ginger bread men.
- Carefully arrange gingerbread house shapes onto prepared baking sheets, about 3 inches apart. Use a bench scraper to straighten out edges in case some of them become misshapen when moving them onto baking sheet.
- Bake larger house pieces for about 15-18 minutes or until edges are lightly browned. Bake smaller pieces for 8-10 minutes or until edges are lightly browned. Allow shapes to cool completely on a baking sheet.
- I used the Wilton Meringue Powder and confectioners sugar to make Royal Icing as the “glue” for the gingerbread house.
Wilton’s Royal Icing
3 tablespoons Meringue Powder
4 cups confectioners’ sugar
5 tablespoons warm water
Beat all ingredients together until icing forms peaks (7-10 minutes at low speed with a heavy-duty mixer, 10-12 minutes at high speed with a hand-held mixer).
** I had to add a little more water then this recipe suggested, to be the consistency I wanted.
Decorating and Constructing Your House
Once my royal icing was done, I put it in piping bags to begin decorating my house pieces. I prefer to decorate all of my house pieces before they go on the house, and use the royal icing to fix anything that may have fallen off during the constructing process. Jeremy and I used the royal icing to draw roof shingles, and bricks on the walls of my house.


I like to have an edible base. I make Rice Krispies treats according to package directions, and press the Rice Krispies treats into an 8×8 disposable pan. The cookie cutter kit that I used had a base. I began by putting icing on the bottom of the base, to stick to the Rice Krispies treat.


Take a handful of Rice Krispies treat and place it on the base of your gingerbread house. Form the Rice Krispies treat to be about the same size as your base, leave about 1/4 inch lip around the base so your walls can fit on the base. This will help the walls of your gingerbread house stay up. Royal Icing takes time to set, and harden. Last year when Jeremy and I were making the house we were trying to hold the walls ups so they wouldn’t fall in. This way with the Rice Krispies treat your house has support on the inside, and the Rice Krispies treat is sticky enough to hold the wall in place as you ice around each wall to really secure your house.

Pipe some Royal Icing onto the base of your house, on either the front side of your house or the back side of your house, to stick that wall up.


Continue building your house this way until you have put all of your walls up.

For the Roof
Pipe a thick line of royal icing on the top of the house, and stick your first roof piece on. Be sure to pipe royal icing in the seams where your roof meets the base of your house. Repeat with second roof piece.


Pipe royal icing inside any seams, inside and outside of the house, to fill any voids.
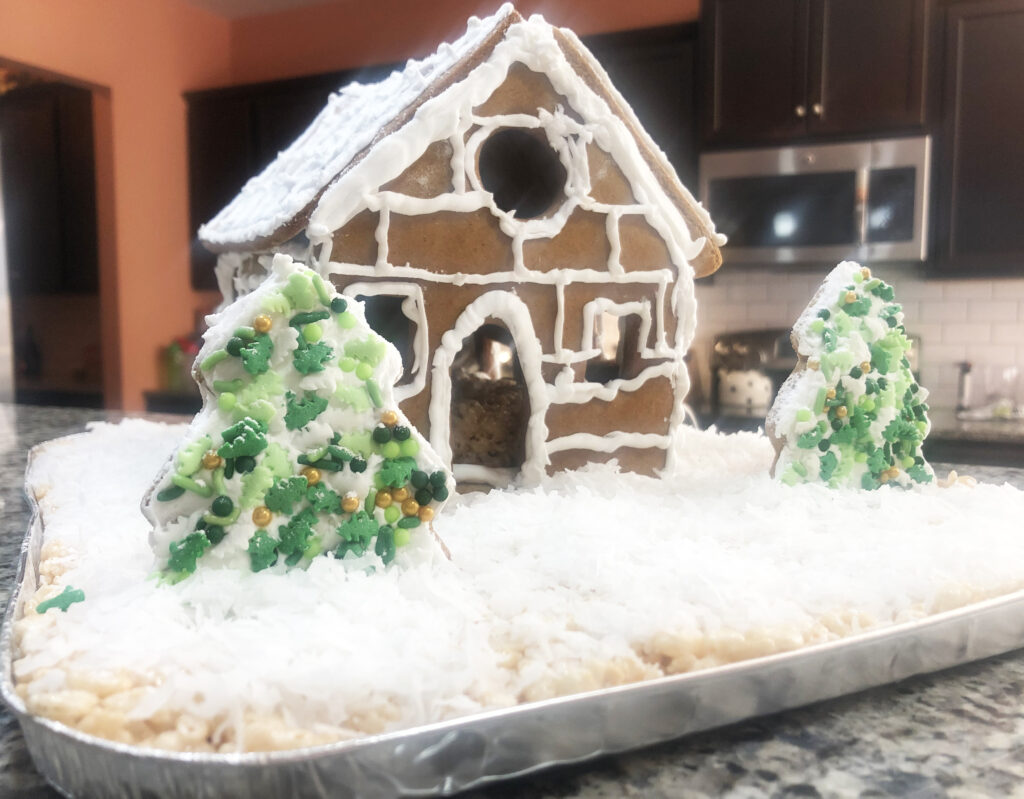
Another reason why I like using Rice Krispies Treats as a base is because its pretty pliable. I can use a butter knife to pry a small opening to stick things into. I decorated a few trees with some green sprinkles and stuck it in the Rice Krispies Treat. I added some more Royal Icing behind the tree to give it more support.

I finished my house by adding “snow”. I put some shredded coconut into the food processor and pulsed until I had small pieces of shredded coconut. I also put some confectioners sugar in a fine mesh strainer and sprinkled some on top of my house.